

Fall Lines Table Runner
Back again at Sew, Mama, Sew for my Fabric Focus column - this month we're making a Fall Lines Table Runner. This little number is reversible, one side being quite minimal and the other featuring a bit of basic improvisational patchwork and it's a super simple project.
Now that we’re into late October, everyone is starting to talk more about the approaching holidays. I thought it would be nice to make something to remember those gorgeous Autumnal colors, and there are oodles of beautiful new fabrics out there.


When I saw the Wa-Modern collection from Hokkoh, I was inspired to create a table runner to use every day from now through our Thanksgiving feast. Simple improvisational piecing combined with free-motion quilting in coordinating threads bring out those Fall colors and echo the lines in the fabrics. (And it’s reversible, making spills disappear almost immediately.)
You can easily adapt this project to any size. Ours is made using the measurements given below and the finished piece measures just about 11½” x 41”.

Gather your materials:
½ yard each of three print fabrics (a main print and two supporting actors)
1 yard of solid linen or cotton
½ yard of fusible fleece or batting
Rotary cutter and self-healing mat (or scissors)
Ruler
Threads in coordinating + contrasting colors
Step 1: Prepare your fabrics and batting:
two squares of the main print measuring 13” x 13 (one for the front and one for the back patchwork)
one square each of the two coordinating prints measuring 13” x 13” (for the back patchwork)
two pieces of the linen/cotton measuring 30” x 13” for the front, and then a piece of the linen/cotton for the back
one piece of fusible fleece measuring 12” x 48”

Step 2: Piece the top:
Note: Seam allowances are ½” unless noted.
Stitch one of the main print squares RS together with one of the linen/cotton pieces along the 13” edge. Press the seam to one side on the WS, then press again on the RS. I have the fabric aligned so that the lines of the print will run into the linen/cotton, thus inspiring the quilting that we’ll do in a bit.
Step 3: Create the patchwork for the back:
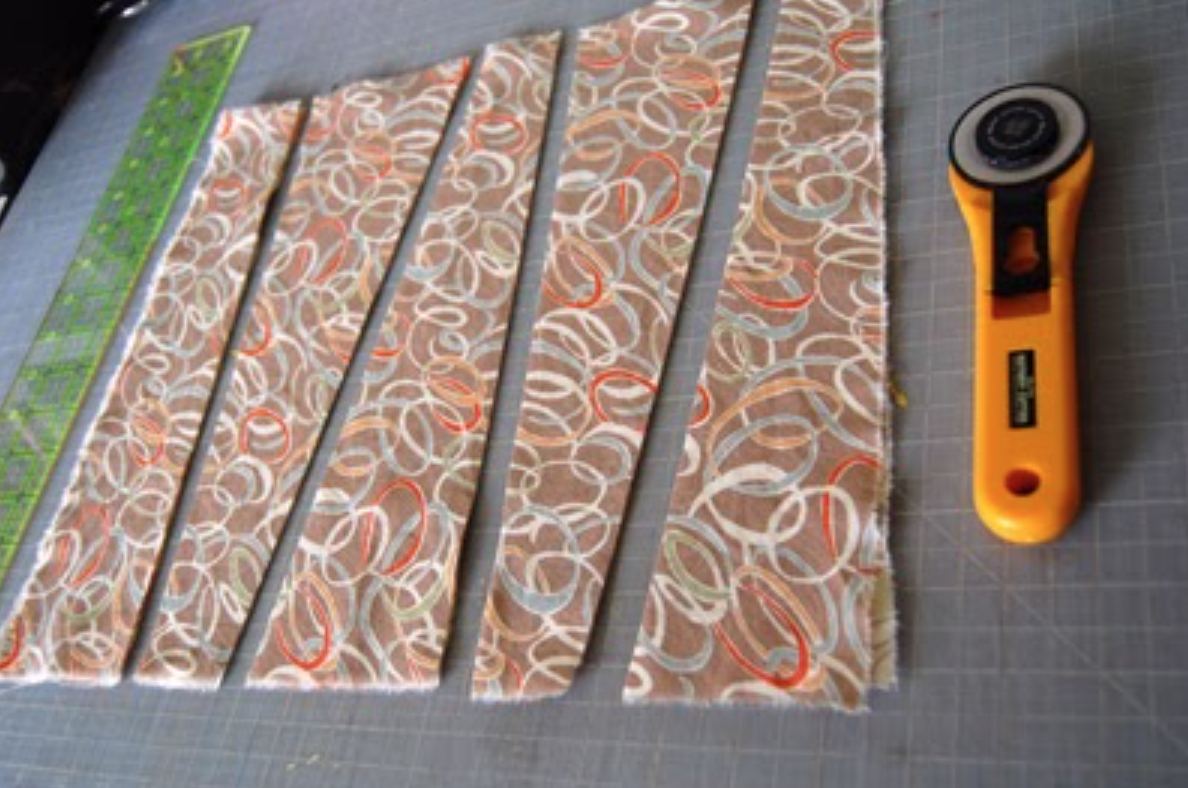
Stack the three remaining print squares on top of each other. Use a ruler and rotary cutter to place four random cuts, dividing the pile into 5 randomly sized strips. There are no exact measurements for this, in fact the beauty is that the size and shape of the finished patches are imperfect.
Stitch the strips RS together along the cut lines, working from the right stack to the left – be sure to vary which prints are beside others as you go. You can’t really mess this up, so have fun! In the end, you will have one piece of improvised patchwork combining your three prints. Square up the edges and corners of the patchwork to create a rectangle.
Next, piece the patchwork to the remaining linen/cotton piece just as you did the top. Press the seam to one side on the WS, then press again on the RS. Cut the back piece to size by matching it up against the top piece.

Step 4: Put it all together:
Note: We are using fusible fleece which provides insulation and also gives the effect of low-loft batting; an alternative would be to use cotton or wool batting.
Lay out the back piece WS up. Place the fusible fleece on top and trim the fleece so that it measures about 3/8” from all edges of the patchwork piece. Iron the fusible fleece to the WS of the back piece according to the manufacturer’s instructions.
Pin the front and back RS together. Stitch together using a 3/8” seam allowance, leaving a 5” opening on one side for turning. Snip the corners and turn right side out, carefully pressing into the corners with a bone folder or chopstick. Press both sides with your iron.
Edge stitch the entire piece using a 1/8” seam allowance, securing the opening closed as you go.

Step 5: Let’s quilt!
Hand- or machine-quilt your table runner. Use the lines of the print as your guide to determining how you would like to quilt the piece and which colors of thread to use. I machine-quilted (using a walking foot) directly on top of a few lines of the print and simply extended those lines the length of the table runner. The main side of the piece uses threads in coordinating colors, and I had cream thread in the bobbin, so the reverse shows all those great quilting lines without the added color.

I hope you enjoy this month’s project and enjoy creating one for your home. Enjoy and happy making! XOXO
GUESS WHAT?
There are dozens and dozens of projects just like this in my FREE PROJECT LIBRARY! Would you like to check it out?
>> Originally published October 26, 2010. Migrated to SQUARESPACE in 2020. <<
Images, text and instructions Copyright 2010 Jennifer Casa. All rights reserved.
*External links may no longer be active.
Sew Mama Sew sent me (free of charge) the fabric I chose to use for this project, however I received no monetary compensation from them at any time.


