

Last Minute Bean Bags

Oh dear. Sunday afternoon and here I sit with a whole lotta heart-shaped bean bags to make for tomorrow's party at kindy. The girls had their valentines finished a week ago. For some reason, my things always are put off until the last minute. But, as luck would have it, this particular procrastination resulted in a streamlined and totally enjoyable method to putting together cutesy bean bags en masse.
Let's do this.

Last Minute Bean Bags
You'll need:
scrap paper + a pen + scissors
red felt (or another thickish soft fabric, flannel would be nice)
sewing machine
a bag of dried beans
one interested kiddo (optional but very helpful - small hands are great for tracing, cutting and stuffing bean bags)
pinking shears
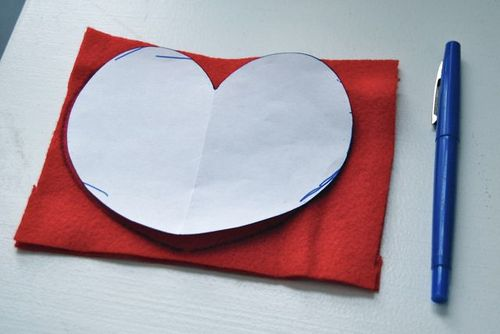

Draw a heart template on scrap paper and cut it out.
Trace your heart shapes onto the felt with a pen. Felt-tipped pens work great here + you'll be cutting off the lines later anyway, so don't fuss with anything more complex than a trusty old felt-tipped pen. You will need two hearts for one bean bag, so double-up the felt when tracing.
Now listen up: do not - I repeat, DO NOT - cut out the individual hearts. This is a major time-suck, and since these are “last minute” bean bags, I'm assuming that you (like I) do not have time on your side right now. Just cut out a rough rectangle around the heart.
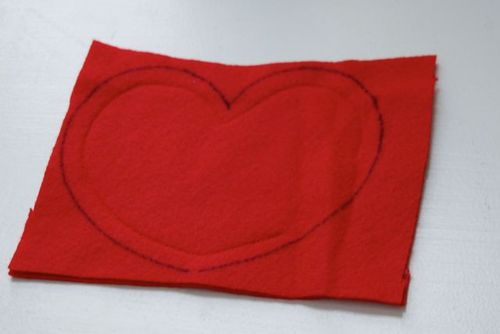
Stitch the 2 layers of felt together, sewing inside the traced heart using the presser foot as a guide (which should have you stitching 1/4" inside the penned lines). Backstitch at the beginning, go almost all the way around, leaving a 1" opening for filling and backstitch here, too.
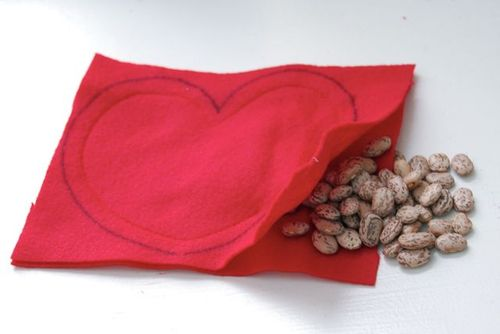
Fill the heart with dried beans until it is plump, but not crazy overfilled.
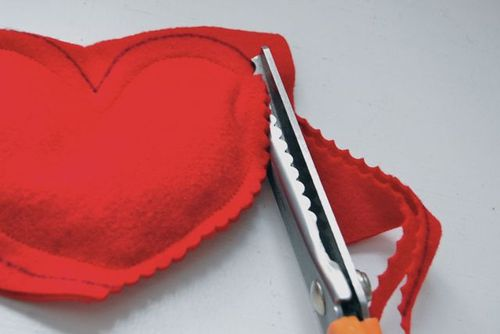
Go back to the sewing machine and stitch the heart closed in the same manner you stitched it together before, using the penned lines + the presser foot to your advantage.
Trim the heart along the penned lines with pinking shears. Voila!
Now play catch for a few minutes.
If you are making enough for an entire class (or two) of kindergarteners as I am, work it assembly line style and you'll be done before you know it.
And be sure to make a few extra to enjoy at home. XOXO

GUESS WHAT?
There are dozens and dozens of projects just like this in my FREE PROJECT LIBRARY! Would you like to check it out?
>> Originally published February 13, 2011. Migrated to SQUARESPACE in 2021. <<
Images, text and instructions Copyright 2011 Jennifer Casa. All rights reserved.
*External links may no longer be active.


